 |
5
| MULTIPLE LEVELS
So lets make this simple
room we've created a little taller and give it a ceiling.
New Blocks
The CEILING Block "-" (that's a hyphen, not an underline)
The CEILING Block is 32 pixels thick and fills the top of the block
space. CEILING Blocks also happen to make great floors for the level above
them!
To Number or Not To Number
Levels in a spot don't actually have to be numbered. Numbering
is an easy way to keep track of what level of a spot you are working on,
but it also means that if you add any new levels to anywhere other than
the top of a spot, you have to go through and change all of your level
numbers. The browser will read the spot just fine whether or not you include
the NUMBER attribute, so this option is entirely up to you. In this tutorial,
we'll go ahead and number them.
Make a taller SPOT.
Add the following code to your 3DML file, AFTER the level that you've
already made.
<LEVEL
NUMBER="2">
###---###
#-------#
#-------#
#-------#
#-------#
#-------#
#-------#
#-------#
#########
</LEVEL>
Now we have changed the dimensions of our SPOT, so
we will have to change the <MAP> tag as well. Change your <MAP> tag
to read:
<MAP DIMENSIONS="(9,9,2)" />
Lets also change the title of this SPOT to Tall Spot. But don't throw
away your firstspot.3dml file. We will use it again later in the tutorial.
Change the TITLE tag to read like this:
 <TITLE NAME="Tall Spot" />
Now save your spot as "tallspot.3dml" and
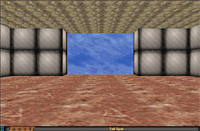
open it in your browser. You should have a tall room with a ceiling and
an opening in front of you.
|

