 |
15
| MORE BLOCKS!
Multiple Blocksets
It is possible to use blocks from more than one BLOCKSET in a single SPOT.
Simply include more than one BLOCKSET tag in your HEAD. Whichever blockset
is specified first will be the primary blockset for the SPOT. All other
blocksets become secondary. Here are a few things to remember:
The default textures for the SKY, GROUND, PLACEHOLDER etc. will come
from the primary blockset.
Within each Blockset, each block has a default symbol. When using more
than one blockset, however, you may encounter situations where the same
default symbol is used to represent 2 different blocks from 2 different
blocksets. In this situation, the default symbols from the primary blockset
(the one that appears first in your 3DML file) take precedence. You can
still use the default symbol for a block in a secondary blockset if that
symbol isn't used in the primary blockset. If you want to refer to a block
that comes from a secondary blockset, thenjust preceed the name of the
block with the name of the blockset, separated by a colon:
<CREATE SYMBOL="A" BLOCK="village:housebase1">
Textures refered to with the @ symbol will come from the primary blockset.
Again, to refer to a texture from a secondary blockset, preceed the name
of the texture with a colon and the name of the blockset:
<PART NAME="n" TEXTURE="@village:bluedoor.gif" />
Use Elements from the Village Blockset
Lets put a LAMP block from the Village blockset into our spot. First, add
this extra <BLOCKSET> tag after the one you already have in your
Tall spot:
<BLOCKSET HREF="http://blocksets.flatland.com/flatsets/village.bset"/>
The Basic and Village blocksets are designed so that the default block
symbols don't overlap, so we can use the lamp block without doing anything
special in the <CREATE> tag. But lets make a <CREATE> tag anyway,
just to illustrate how it works.
Add the following code to the beginning of the BODY section of tallspot.3dml:
<CREATE SYMBOL="v" BLOCK="village:lamp">
</CREATE>
And change level 3 of your map to look like this:
<LEVEL NUMBER="3">
.........
.........
.........
.........
....~....
.........
..v...@..
.........
.........
</LEVEL>
Now go back to the create tag that you made way back in the beginning of
the tutorial for the FULL block (#) and change it to read:
<CREATE SYMBOL="#" BLOCK="full">
<PART NAME="n,s,e,w" TEXTURE="@village:sqcel.gif" />
</CREATE>

Now save your file and open it in your browser.
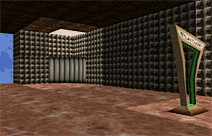
You should see a streetlamp from the village set up on the roof, and the
walls on the bottom level should be covered in square bumpy things.
 |
 |
Double-Characer Symbols
Back at the very beginning of the tutorial, we talked about the MAP tag.
The MAP tag has an attribute called STYLE that lets Rover know what kind
of symbols you will use to represent your blocks. By default, the value
of STYLE is "single", meaning that you will use single ASCII characters
to represent your blocks. This limits you to 92 different kinds of blocks,
however, because that is how many ASCII symbols there are on your keyboard,
(minus a couple that are reserved by 3DML). But if you are making a somewhat
extensive spot, with several custom textures and many rotations of blocks,
then you could easily run out of characters. That's where STYLE="double"
comes in. With STYLE set to double characters, you can use any combination
of 2 ASCII characters to represent each block, raising the number of possible
blocks from 92 to over 8000!
When you use a double-character map, you must also use double-characters
in your CREATE tags, or anywhere else that you might be referring to blocks.
Each block has a single character symbol by default. The default double-character
symbol for each block is the same as the default single character, preceeded
by a "." So the default symbol for the FULL block, "#", becomes simply
".#". An NRAMP block is normally "N", and its double-character default
is ".N", etc.
When you make a map
with double characters, you can leave a space in between the symbols for
each block, so that you can read your map more easily. Here's a very simple
single character map, and the same map made again with double characters:
<LEVEL NUMBER="1">
#####
#.N.#
#...#
#W.E#
#...#
#.S.#
#####
</LEVEL>
<LEVEL NUMBER="1">
.# .# .# .# .#
.# .. .N .. .#
.# .. .. .. .#
.# .W .. .E .#
.# .. .. .. .#
.# .. .S .. .#
.# .# .# .# .#
</LEVEL>
Its not necessary for
you to convert your tallspot.3dml spot to double characters, but
here's what it would look like if you did, with all changed tags in
bold.

|

